⚠️ Before you begin this integration be sure to let us know so we can enable the Dotdigital CRM integration on your Duel account
ℹ️ Dotdigital Help Center (external resources)
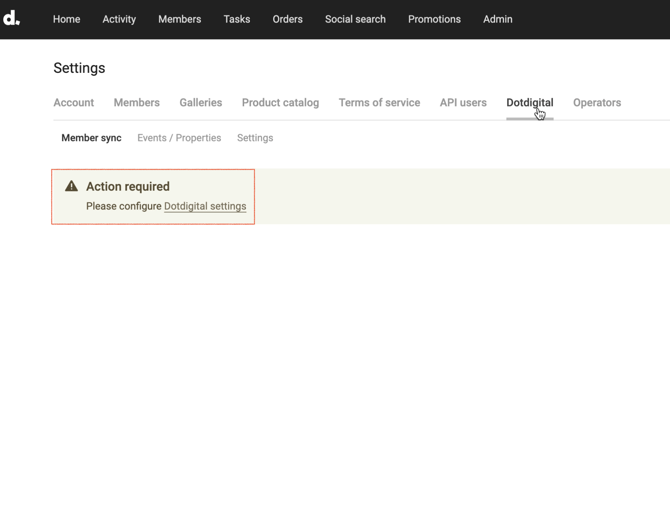
Step 1: Connect Duel to Dotdigital
The operator will need to authenticate/configure within the Dotdigital settings area.
Step 2: Create an API user & Address Book ID
Open Dotdigital to create an API user. Navigate to Settings (three dots at the bottom left corner) > Access:
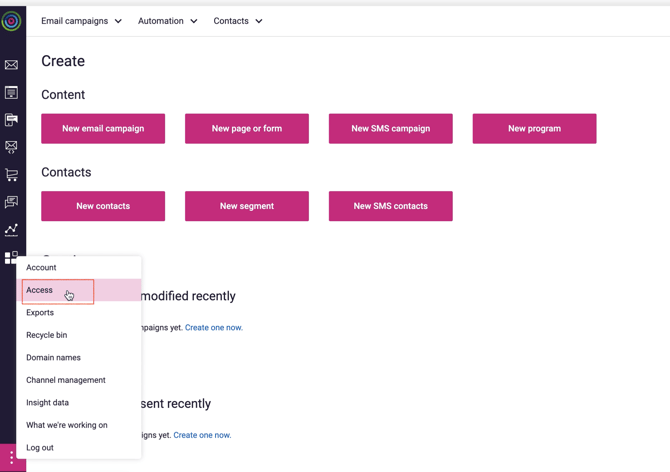
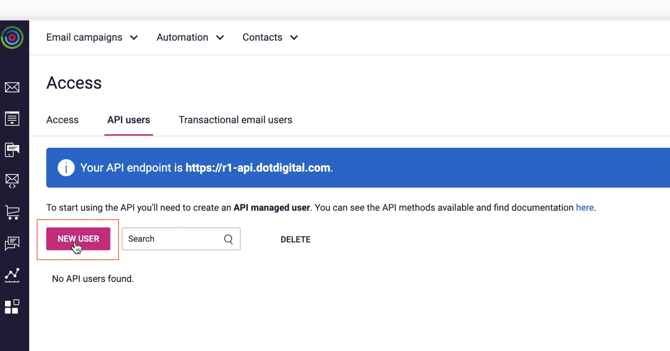
Once at the Access menu, click on API users and select NEW USER to create an API managed user.
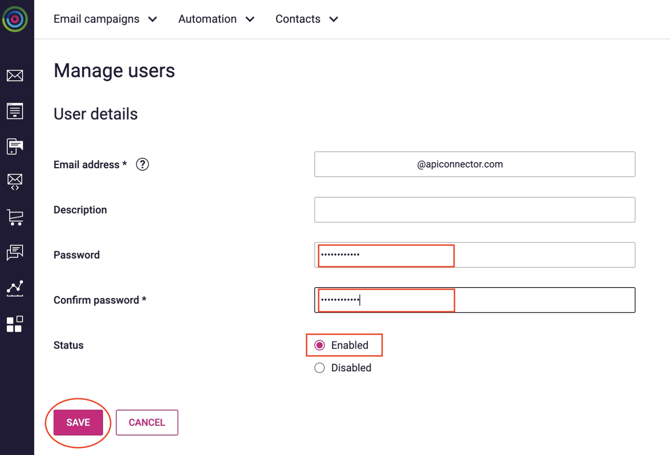
The username (email address) is automatically generated for you and must not be edited.
You can also add a description (optional) and you must create a password and confirm it.
Then select Enabled and click save:
Open Dotdigital to create an Address book ID. Navigate to Contacts > All Contacts:
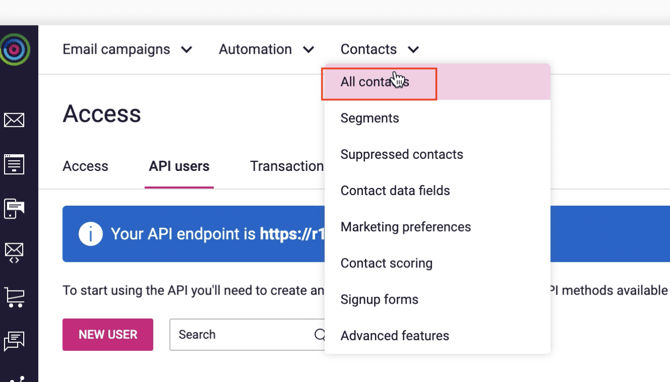
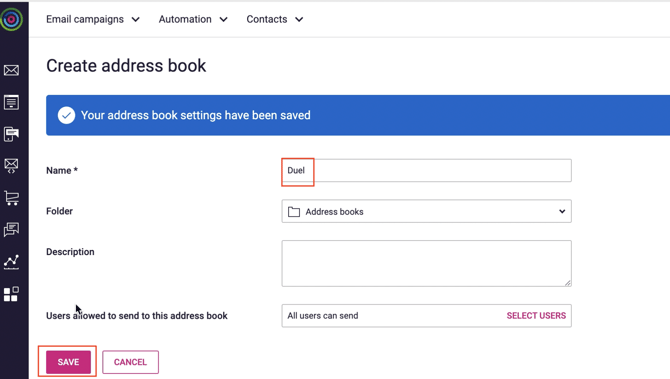
Then create a New Address Book and give it a name, e.g. Duel and click SAVE.
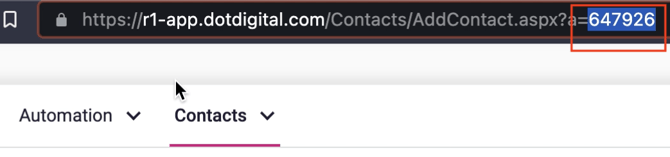
Copy the Address Book ID from the URL - it's a set of numbers like the one highlighted below.
Step 3: Add new API user & Address Book ID to Duel
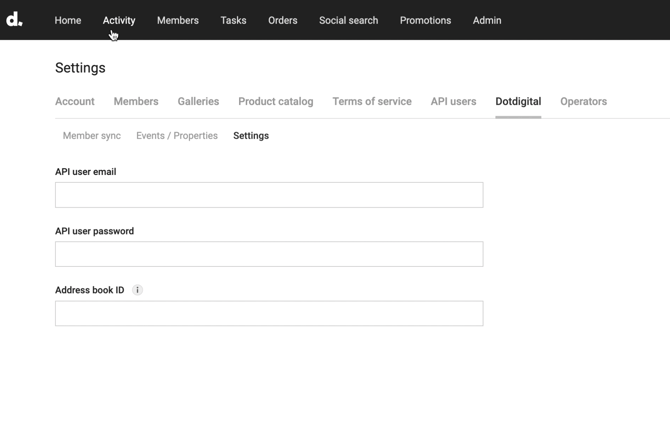
Open the Duel app and head to Settings in the top right, followed by Dotdigital. You will then need to open up the Settings sub-tab. From here, you can paste your API user email, password and Adress book ID into the relevant fields and click SAVE.
Step 4: Enable Duel’s events & properties
Within the Dotdigital section of the Duel app, head to Events/Properties and switch on all elements that you’d like sent over to Dotdigital.
We recommend enabling all to start with, so as to capture as much data as possible.
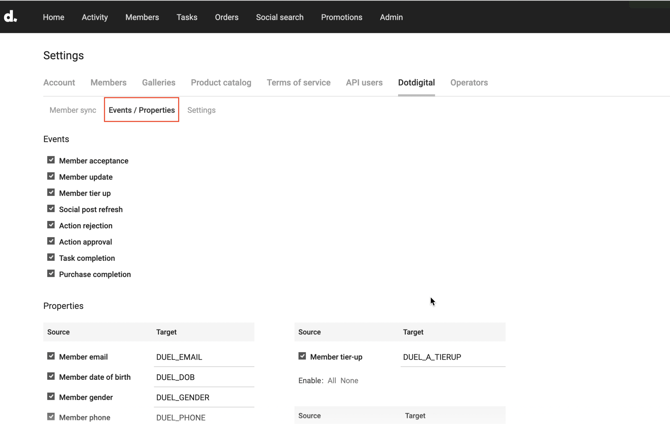
NOTE: You are able to change/edit the Target names for each property source if you would like to.
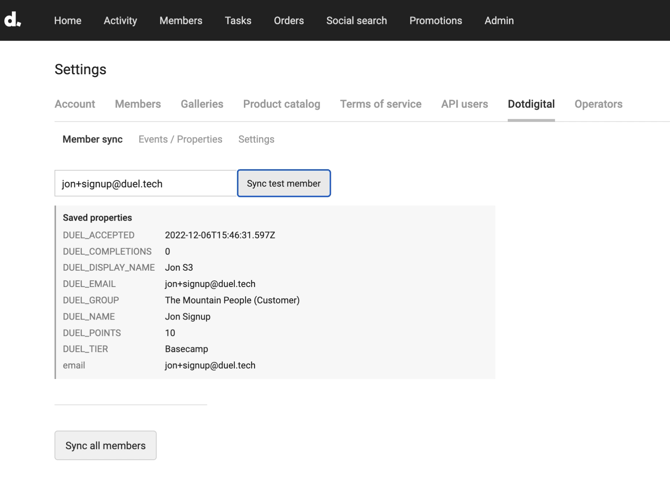
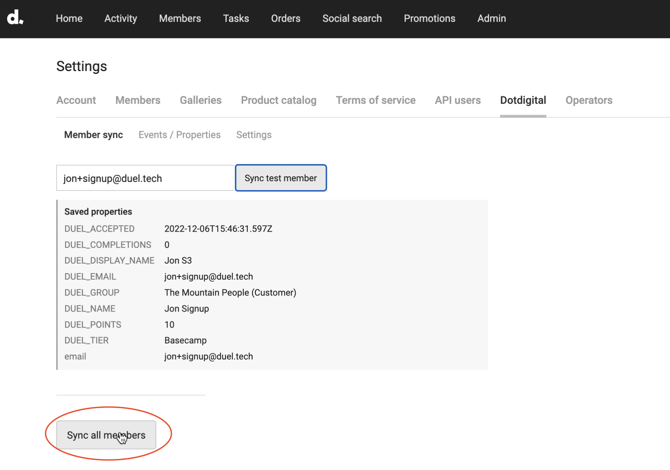
Step 5: Test Advocate Syncing
Then we can test the integration by syncing a single Advocate from the Duel platform by entering their email address under Dotdigital > Advocate sync and then clicking the Sync test Advocate button (this needs to be an actual Advocate of the programme).
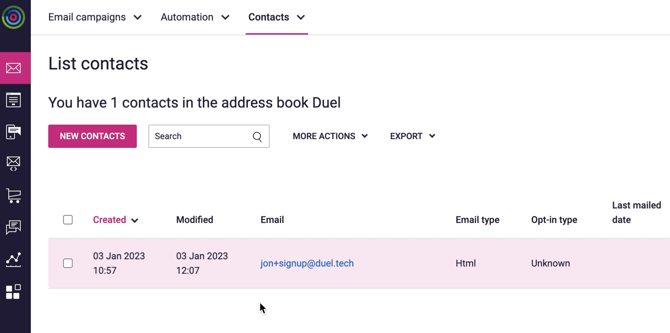
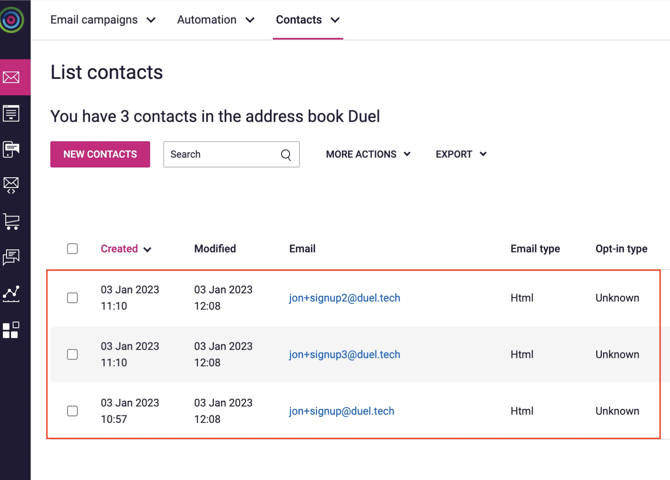
Head back into Dotdigital, go to Contacts > All contacts > Address books and search for the email address of your test Advocate in the recently created Duel address book.
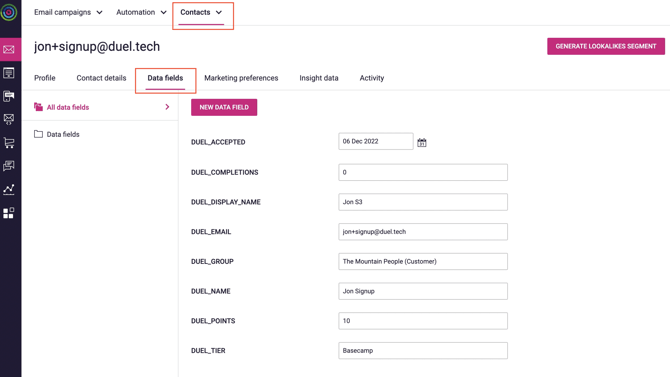
Click on the email address of your test Advocate and then head into Contacts > Data fields and you'll be able to take a look at their contact details with all of the synced Duel events & properties.
Step 6: All Advocates syncing
If the test Advocate & information has synced correctly, you can head back to the Duel app and click Sync all Advocates under Advocate sync.
🕑 Note that this process can take a few minutes to complete
Once all Advocates have been synced, the total number should appear as below:

If you head back to Dotdigital, you'll be able to find all synced contact records under Contacts > All contacts > Duel Address book.
Step 7: Test the integration
As Advocates signup to the Program and submit tasks through the Duel portal, these will appear in Dotdigital.
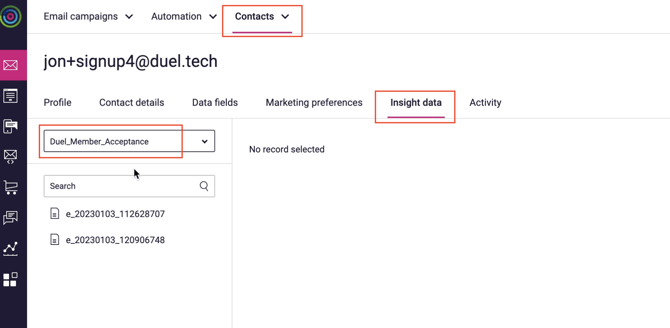
Select the Advocate you want to look into under Contacts > Data fields and then head into Insight data. You'll be able to see that Advocate's Duel Activity using the highlighted dropdown menu with different Duel events & properties.
Step 8: All done! You are now integrated with Dotdigital
Now it's time to set up some epic flows to help really build that community!